How to Make a Santa Cheese Board for Christmas
This post may contain affiliate links – please read my disclosure statement.
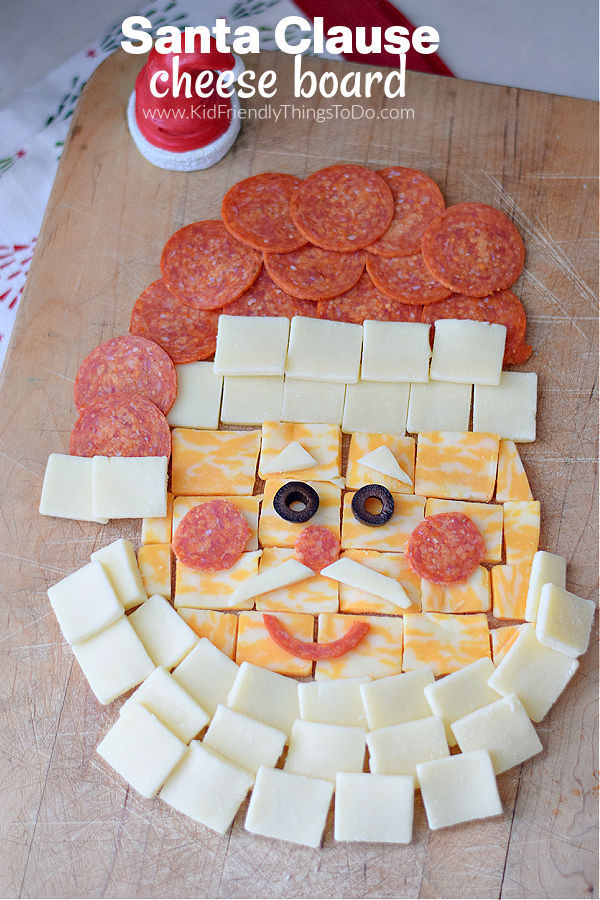
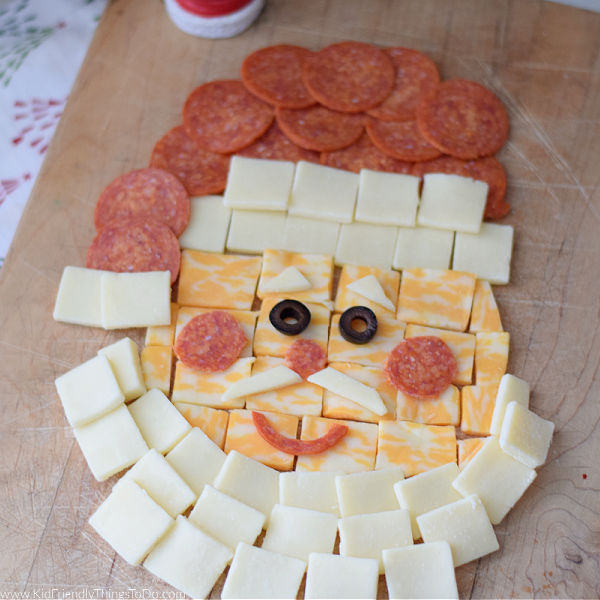
This fun and fest Santa Cheese Board is perfect for your Christmas party. It’s so easy to make and delicious to eat. This holiday-themed snack will be as much fun to eat as it is to create.
Santa Cheese Board
This is such a simple appetizer to make, and your guests will absolutely love the festive flare it brings to your holiday party. I love making anything fun and holiday-related like this Gingerbread boy shaped cheeseball or this fun and simple Vegetable Christmas Tree
What I love about this Santa Cheese Board Snack Idea:
- easy to make – the kids can even help
- it has very few ingredients that are easy to find
- it’s so much fun and festive
- a great holiday tradition
- you can easily substitute other meats and cheeses
Ingredients
If you are ready to make this fun snack board for the holidays, let’s make sure you have everything you’ll need:
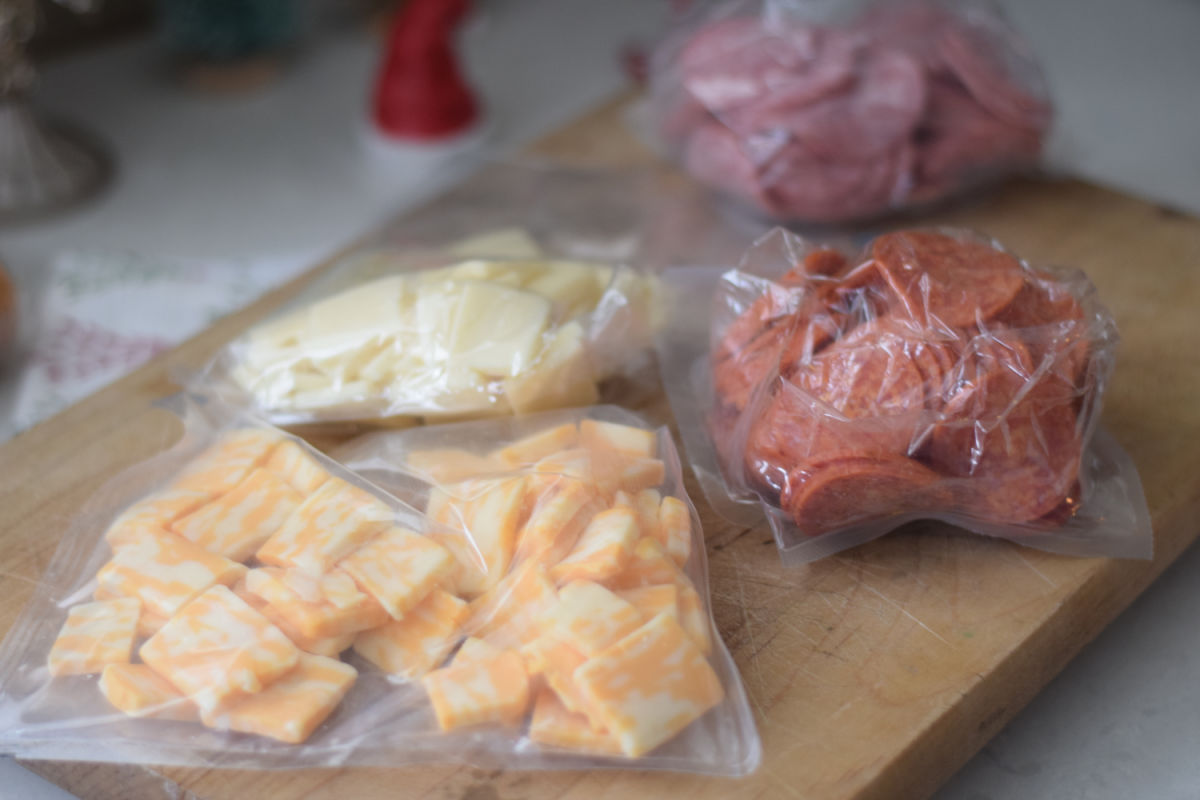
- Yellow cheese squares – I used pre-cut Colby Jack cheese squares. You could substitute with yellow cheddar, yellow American, or any other yellow cheese you find
- White cheese squares – I used pre-cut White Cheddar Cheese squares, but you could certainly use Provolone, Mozzarella, or even Swiss
- Pepperoni slices – this will be an essential part of your Santa. It will be used for the hat and as other facial features on Santa
- Sliced black olives – You will only need two slices for the eyes, so you can add a bowl of sliced olives next to the cheeseboard or add it to some delicious olive tapenade.
- Kitchen shears – these will be used for cutting the cheese into shapes or trimming the cheese pieces to make them curved.
How do you make a Santa Cheese Board for Christmas?
Step One
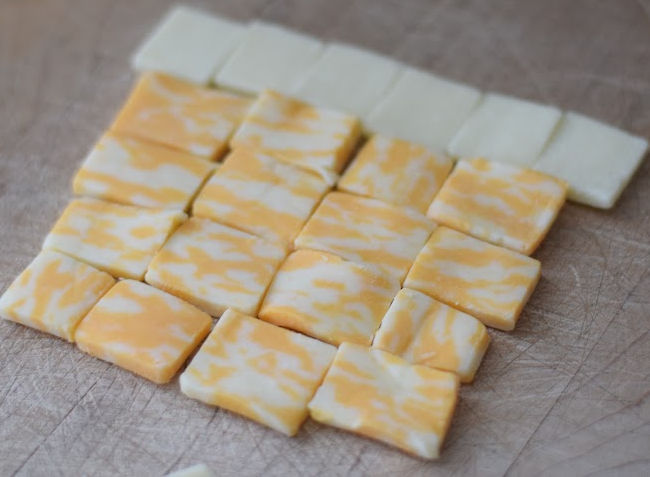
- Using a cutting board or a tray to place cheese on, start out by making 4 rows of yellow cheese
- Add a row of white cheese above the yellow – extending it out a little past the yellow cheese rows – on both sides. This will be the base of the hat
Step Two
Using pepperoni, shape a Santa hat with layers – making the top look curved. You may end up with three or four rows of pepperoni to get the hat tall enough
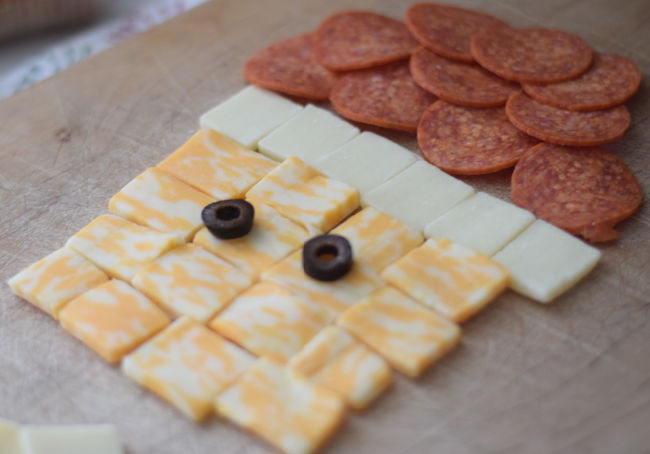
Step Three
- Add a (shorter) second row of white cheese overlapping the bottom row of pepperoni – adjusting as you see fit. (I was testing the placement of the eyes at this stage, but you can wait)
- Extend the pepperoni around the side of Santa’s face to make the portion of the hat that hangs down.
- add some white slices to the bottom of that piece for the big round ball
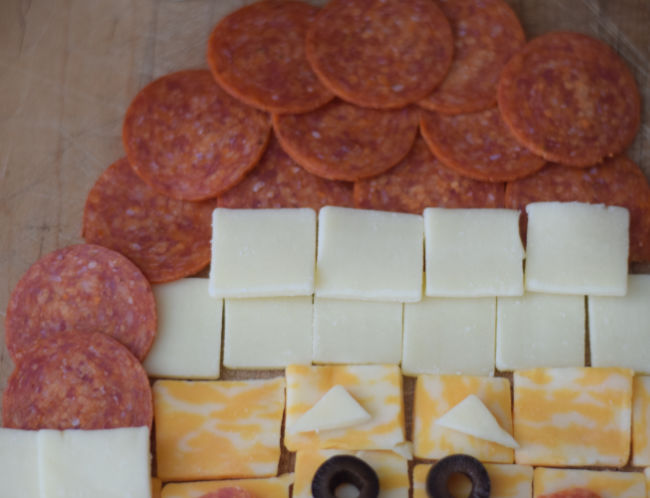
Step Four
- Add three curved rows of white cheese to the bottom to look like a beard.
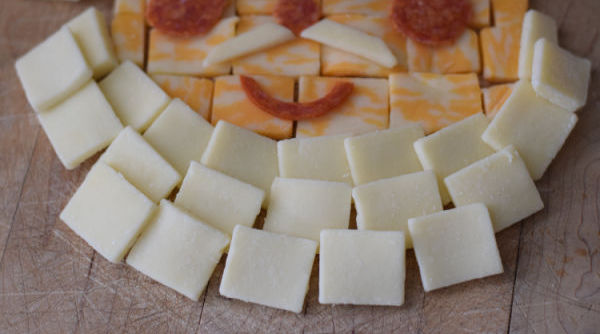
Step Six
- Shape a mustache and eyebrows out of white cheese. The cheek, mouth, and nose are cut from pepperoni slices. Place them on the face along with olive eyes.
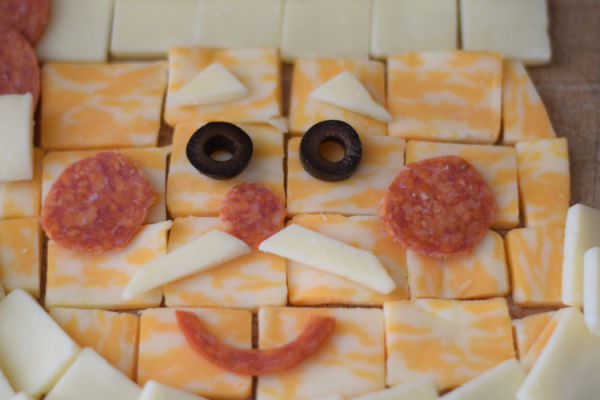
Step Seven
- Make any adjustments necessary by trimming pieces of cheese with kitchen shears.
- Add crackers to enjoy this meat and cheese board with different spreads like spicy mustard or olive tapenade.
FAQs
Make-Ahead and Storage
How far in advance can I make this cheese board?
You can make this cheese platter a few days before your party, although one day in advance would make it the most fresh. Just cover and store it in the refrigerator until you are ready to serve it.
Storing: store this meat and cheese platter covered and in the refrigerator
FAQs
What types of Meat and Cheese can I use for this Cheese Board?
- yellow cheeses – American, Colby Jack, or Cheddar
- white cheese – Swiss, Pepper Jack, Gouda, Havarti, or aged White Cheddar
- meats – pepperoni, salami, or prosciutto
Grain crackers, butter crackers, artisan crackers, or toasted baguette slices
Expert Tip
- I found a cheese board at Sam’s Club that is from Hormel, and it already had almost everything I needed
More Christmas Party Treats
Let’s Hang Out!
I’d love to see more of you. Please consider following along on Pinterest or Joining us on my Facebook Page, Cooking Up Fun, for more fun ideas and family recipes!

How to Make a Santa Cheese Board for Christmas
Equipment
- kitchen shears
Ingredients
- 1 10 oz. Colby Jack cheese squares or other yellow cheese
- 1 10 oz. White Cheddar Cheese squares or other white cheese squares
- 1 3 oz. pepperoni slices
- 2 slices of black olives
Instructions
- using a cutting board or a tray to place cheese on, start out by making 4 rows of yellow cheese

- Add a row of white cheese above the yellow. It can extend out beyond the yellow a little bit. This will be the base of the hat
- Using pepperoni, shape a Santa hat with layers a little bit above the white layer – making the top look curved. This will probably take 3 or 4 rows or pepperoni. (At this point I was testing out eye placement. It is not necessary to add the olives, yet)

- Add a second layer of white cheese (using one less piece) between the first white row of cheese and the pepperoni – overlapping the pepperoni
- extend the pepperoni around the side of Santa's face with one layer wide to make the portion of the hat that hangs down

- add some white slices to the bottom of the pepperoni that hangs down the side of the face for the big round ball
- add 3 curved rows to the bottom of the yellow cheese (making a beard)

- finally shape a mustache and eyebrows out of white cheese, cheeks, mouth, and a nose out of pepperoni and place them on the face along with olive eyes

- add crackers to enjoy this meat and cheese board with
Notes
Nutrition facts are only an estimate
How far in advance can I make this cheese board?
You can make this cheese platter a few days in advance of your party, although only one day in advance would be best. Just cover and store it in the refrigerator until you are ready to serve it Storing: store this meat and cheese platter covered and in the refrigeratorWhat types of Meat and Cheese can I use for this Cheese Board?
- yellow cheeses – American, Colby Jack, or Cheddar
- white cheese – Swiss, Pepper Jack, Gouda, Havarti, or aged White Cheddar
- meats – pepperoni, salami, or prosciutto
Tips and Tricks:
- I found a cheese board kit at Sam’s Club that is from Hormel, and it already had almost everything I needed

